My life revolves around buying secondhand wherever I can. although I do have a weakness for new fabric, haberdashery and sewing supplies, and gardening. Both hobbies have equal importance in my life overall, but at different times of the year.
The intention has always been to grow my flowers in raised beds and Chill, and I spent some time last year debating the best material to make the raised beds from. We debated the merits of prebuilt plastic raised beds (too expensive), plastic scaffolding (too expensive and complicated), and metal. We finally settled on used floorboards as being the most suitable material to make the beds from. Chill collected the boards one day last year and stored them until we were ready to make them.
Floorboards waiting to be cut
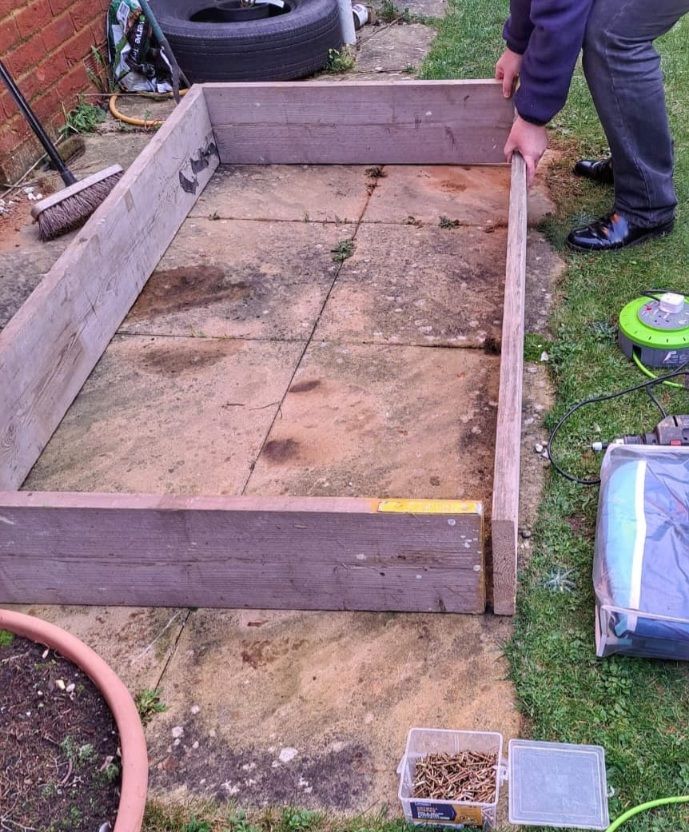
The beds were built one bright, breezy but cold December afternoon with help from our apprentice.
Carpentry apprentice
They are approximately 162 cm long by 90 cm wide.
2 of them have been sited in full sun or partial sun so as to receive the the maximum sunlight for the flowers that I am growing, the other one in semi shade so that I have a wide range of growing conditions for my flowers. All the beds were placed on grass to wait for the next stage.
Raised bed in situ
Whilst I was searching for land last year, Chill and I decided that it would be a good idea to redesign some of the patches of grass at the side of his house and make them into more of a decorative shrub border, that might also provide some foliage for bouquets should it be required. To do this, a thicket of Eleangus needed to be cut back. (This has been described in a previous post) The cut back branches were placed to one side until the raised beds were made.
Branches waiting to be chipped
We had already decided that the prunings could be used to provide a base in the raised beds that we had built. The stems of the cut back bush were put through a chipper and the chippings placed in the base of the beds.
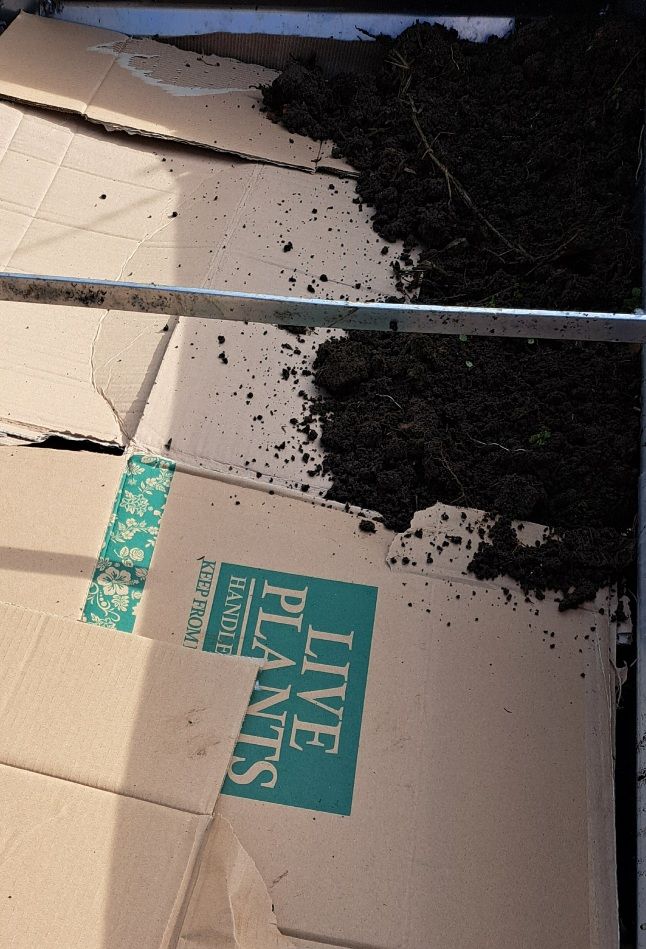
I read a lot of gardening books, and I had taken note of the idea of no till gardening. This appealed to me for obvious reasons. No till, means just what it says, the soil is not dug, but it is prepared for planting with compost and a weed suppressant type fabric, I decided to use cardboard as my weed suppressant. The cardboard will also eventually rot down and help to condition the soil.
So Chill and I began to save our cardboard for future use in the raised beds. The base of the raised beds were then covered with the cardboard that we had been saving
Cardboard over chippings in raised bed
The next stage was to add the soil and gravel. It was necessary to wait until the weather conditions were suitable to have the soil and gravel delivered. Although, I do have 2 sets of weatherproofs, I did not really want to be shovelling soil and gravel in wet, freezing conditions. The day finally came 2 weeks ago when the weather conditions looked as though I could start thinking about purchasing my soil.
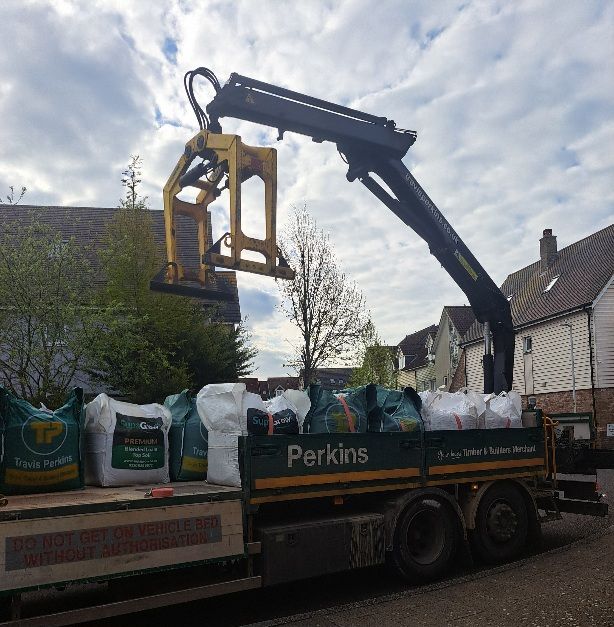
I used a local company, Travis Perkins, who have historically been very helpful to me and my family. I had previously been to their depot to have a look at and compare their top soil, loam and gravel. I placed my order and waited with anticipation for delivery day. The day finally came last week when I had 3 tonnes of loam and gravel delivered.
Lorry delivering loam and gravel
Travis Perkins, did not let me down and the delivery took place at the right time on the right day without any hitches. I have to say, it did rather remind me of my childhood when watching the remote controlled model boats on local boating ponds, watching the crane lift and then lower the tonne bags of soil and gravel.
Lowering the soil
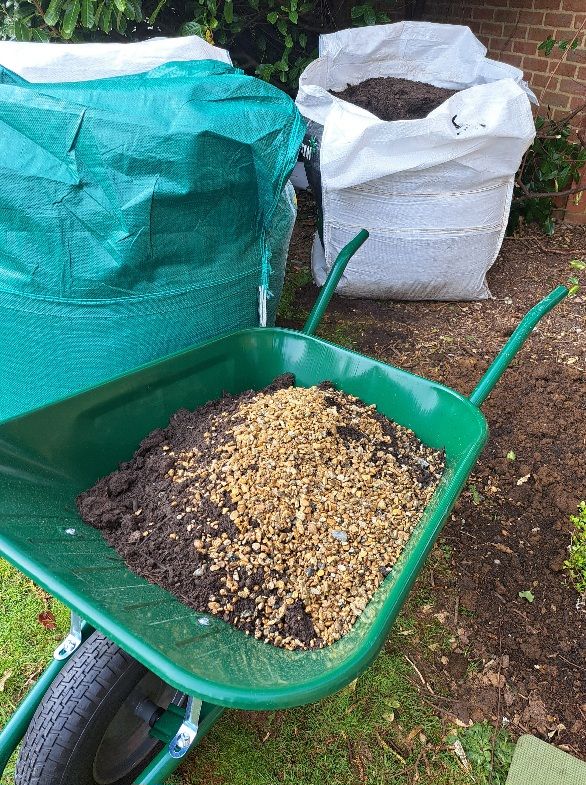
Once the bags were in place, it was then time to distribute the soil into the raised beds. I had worked out the ratio of loam to gravel that would be best to put into the beds and the weight that I could comfortably manage to tip up in my wheelbarrow.
Wheelbarrow filled with mixed soil and gravel
I had been prepared to spend a considerable amount of time on this task, in actual fact it did not take as long has I had expected and although the forecast was showery, I managed to dodge the showers and it was quite a pleasant task to do in the spring sunshine. I took my time, and several hours later, I had managed to shift just over one tonne of loam and gravel. I redisbributed the soil and gravel into 2 of the raised beds in this garden, the raised bed in my garden and the various pots that were distributed around both gardens to wait for the next stage of my cut flower journey.


Leave a comment